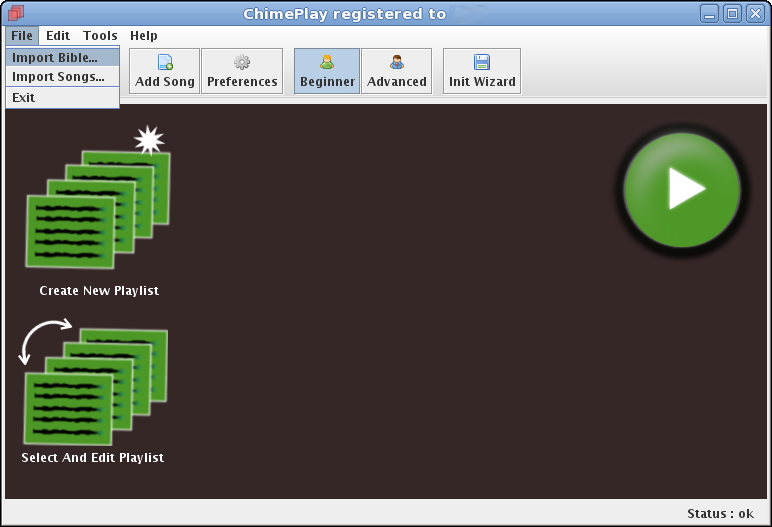
ChimePlay

ChimePlay is a new software package that allows multiple songs and bible passages to be displayed in fullscreen mode

Thousands of songs can be stored and searched at any time for your meeting or presentation

Multiple background images can be seamlessly selected as backgrounds to songs or bible passages

Playlist editor

Playlist The ChimePlay Playlist Editor allows you to select your songs or bible verses quickly. Changing the order of the playlist items is just a matter of clicking to move the song into the required position. Searching your list of songs is easy with a simple search mechanism

Song editor

Song Editor ChimePlay Song Editor allows entry of verses and ordering of verses, chorus or bridges. You can change the text or order of a song. Adding a verse is simple, just add the text. You only have to type the chorus or bridge in once, then just click to say where you would like it to appear

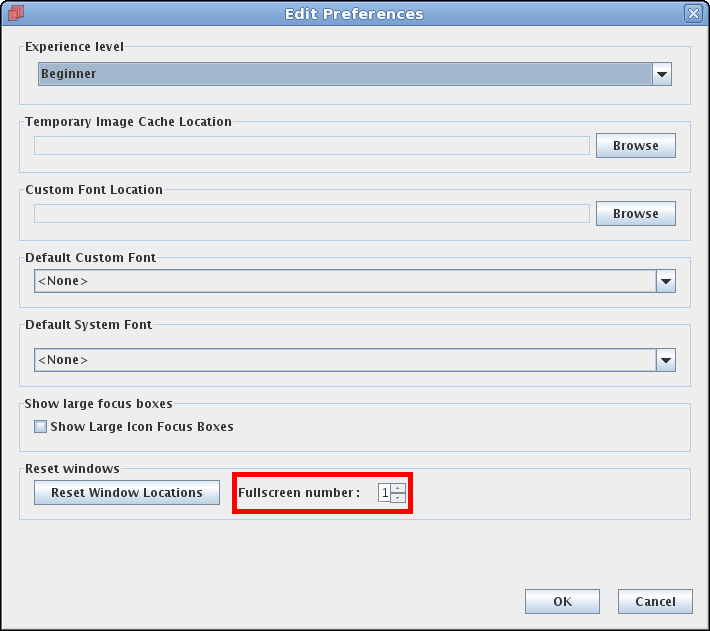
Display Styles editor

Style Editor 
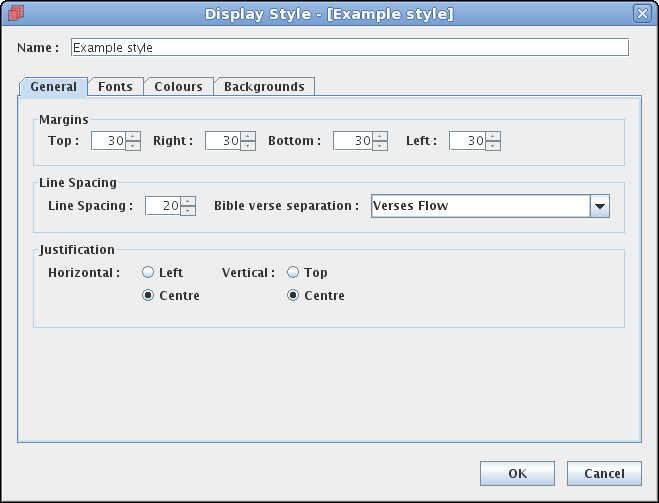
ChimePlay display styling allows you to customise lots of different aspects of how your final screen will look from which fonts to what text colour, from background images to screen margins. Bible verses are subtly marked with their verse number too and their layout can be simply modified

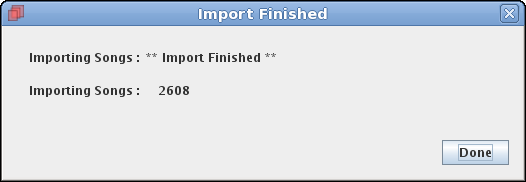
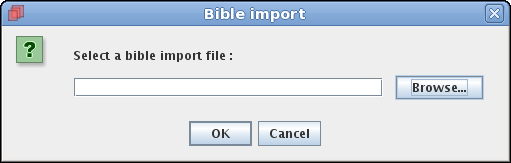
Tagging, sharing and exporting

Export 
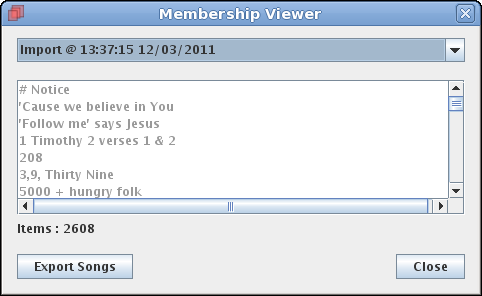
ChimePlay's Membership Viewer has easy options to move songs about from one ChimePlay system to another. Choose your new song or groups of songs then quickly and easily import them on the day to your main meeting ChimePlay system.

Choose from the topics below to get step-by-step instructions...

Installation 1 of 5

Chimeplay Installation The ChimePlay installer will take you step by step through the process of installing ChimePlay on you machine. To start the process, click the Next > button

Installation 2 of 5

Chimeplay Installation Click the Browse... button to select your downloaded ChimePlay licence file on your hard-drive. Then, click the Next > button to continue

Installation 3 of 5

Chimeplay Installation This screen allows you to choose your installation folder, click the Browse... button to specify which folder to install to. Then, click the Next > button to continue

Note : Do not select the Desktop or a folder on the Desktop as your installation folder as the shortcut icons will not be created correctly

Installation 4 of 5

Chimeplay Installation Confirm the details for your installation are correct. Then, click Install to complete the installation process.

Installation 5 of 5

Chimeplay Installation The installer will show you the progress of the installation. When it has completed, click the Finished button to close the installer. The ChimePlay icon will be on your desktop ready to use.

In the Windows installation you can also find a ChimePlay shortcut on the Start menu under the Ignesco Software group

Importing Songs 1 of 3

Playlist ChimePlay allows you to import multiple songs from a file on your computer. From the the File menu at the top of the application, select "Import Songs...", this will start the process of importing your songs.

Importing Songs 2 of 3

Playlist Click the Browse button to select the file to import from, or just type the full location into the text box. Then click OK to start the import

Importing Songs 3 of 3

Playlist Progress of the import process is reported, and when the file has been fully processed the songs will be available to use, click the Done button to return to the application.

Licence Upgrade 1 of 6

Playlist After you have purchased a permanent licence you can easily activate your new licence and continue using ChimePlay. From the the Help menu at the top of the application, select "Licence Manager...", this will start the process of adding your new licence.

Licence Upgrade 2 of 6

Playlist In the ChimePlay Licence Manager click the Load Licence button.

Licence Upgrade 3 of 6

Playlist Click the Browse... button to specify the file that contains your new licence, or just type the full location into the text box. Then click OK to load the new licence

Licence Upgrade 4 of 6

Playlist The licence is read from the file you selected and the details are displayed. If the licence is valid then you will see the "Licence is valid" message. After confirming the licence is correct, click Save Licence button

Licence Upgrade 5 of 6

Playlist The Licence Accepted message means that your licence has been activated. Click OK to continue

Licence Upgrade 6 of 6

Playlist Now click the Close button to finish the licence activation process. When you next start ChimePlay the application will use your new licence

The Toolbar

Chimeplay Installation The ChimePlay Toolbar allows quick access to common actions

  • The Play button - This button starts the fullscreen display of the active Playlist. If there is no active Playlist, then the user is prompted to choose or create a new Playlist

  • The New button - This button opens the Playlist creator screen. This Playlist will be the new active Playlist

  • The Edit button - After selecting a Playlist to edit this button opens the Playlist editor screen so that you can modify the Playlist

  • The Add Song button - This button opens the New song editor screen so you can add a new song into ChimePlay

  • The Preferences button - This button opens the preferences screen so that you can :

    • Select the application experience level
    • Select font directories and default fonts
    • Toggle the beginner level large icons tab selection boxes
    • Reset all the ChimePlay application window sizes and locations
    • Select the screen number where the fullscreen mode window should be shown

  • The Beginner / Advanced buttons - These buttons switch the ChimePlay application to and from Beginner mode and Advanced mode.

  • The Init Wizard button - This opens the quick task selection screen, the user can select multiple task to perform in sequence. The tasks are :

    • Import Songs
    • Import a Bible
    • Edit the default Display style
    • Edit the default Bible Display style
    • Create a new song

The Beginner's screen

Chimeplay Installation The main ChimePlay Beginner's screen has three large buttons, you can use them to perform the following tasks :

Create New Playlist

When you click this button, the PlayList Composer screen is shown. Typing a partial phrase or song name into the search box will automatically search if you pause for more than two seconds. Bible verses can be selected by choosing the bible tab.

Once you have clicked to highlight a song (or bible verse) click the Select button to add it to the Playlist

Use the Up and Down buttons to change the order of items in the playlist.

If you already have an active Playlist, ChimePlay will ask you if you really want to start a new Playlist.

Select And Edit Playlist

When you click this button, you are presented with a few of the last Playlists to choose from. Click the Playlist that you want to edit and make the active Playlist.

The Play Button

When you click this button, the active Playlist is displayed in fullscreen mode.

If there is no active Playlist, then you will be prompted with a few of the last Playlists to choose from.

Remember to exit fullscreen display mode, press the 'q' key.

The Playlist Composer

Chimeplay Installation

Selection

The PlayList Composer screen is used to build your playlists. Typing a partial phrase or song name into the search box will automatically search if you pause for more than two seconds. Bible verses can be selected by choosing the bible tab.

Once you have clicked to highlight a song (or bible verse) click the Select button to add it to the Playlist

Clicking the Deselect button will remove the selected playlist item from the playlist

Click the Clear button to clear the search area and restore the full list of songs

Playlist Order

Use the Up and Down buttons to change the order of items in the playlist.

Find

Clicking the Find button will show the text of the selected playlist item and select it in the full list on the left-hand side

Finishing up

Clicking the OK button will save your playlist. Clicking Cancel will close the screen without saving. These buttons will prompt you if your playlist has changed from when you first opened the PlayList Composer screen.

The Display Style screen 1 of 4

Chimeplay Installation The first tab on the Display Styles screen is used to set the margins that are placed around the text displayed in fullscreen mode.

You can set the extra spacing between the lines of text, and the flow behaviour of bible verses. You can set the horizontal and vertical text justification of text in fullscreen mode. Typically you would have centre justification for songs, and top left for bible verses.

The Display Style screen 2 of 4

Chimeplay Installation The second tab on the Display Styles screen is used to select the font, font size and font style to use for text in fullscreen mode.

The Display Style screen 3 of 4

Chimeplay Installation The third tab on the Display Styles screen is used to select both the font colour and the background colour for text in fullscreen mode.

The Display Style screen 4 of 4

Chimeplay Installation The fourth tab on the Display Styles screen is used to apply background images to fullscreen mode. You can choose: No images, Single image - browse for a simgle image file to use, Multiple images - browse for a folder that contains images to use.

You can scale the image using several different modes, and you can slide the image contrast slider right to lighten or left to darken it.

Importing Bibles 1 of 3

Chimeplay Installation ChimePlay allows you to import full bible texts from a file on your computer. From the the File menu at the top of the application, select "Import Bible...", this will start the process of importing your bible text

Importing Bibles 2 of 3

Chimeplay Installation Click the Browse... button to select your ChimePlay format bible text file. Then click OK to start the import

Importing Bibles 3 of 3

Chimeplay Installation Progress of the bible import process is reported, and when the file has been fully processed, the bible will be available to use, click the Done button to return to the application.

Adding songs

Follow the steps below to add new songs :

  1. Click the Add Song button on the ChimePlay toolbar to display the new song screen
  2. Enter a title and type in the verses from the song
  3. If the song has a chorus (or a bridge), type the words of the chorus in and then click the Chorus selector
  4. The next time you want the chorus, don't type it in, just click the Chorus selector at the point you want the chorus to appear
  5. You can reorder the verses by selecting the Up or Down icons
  6. You can add space for more verses by clicking the More Verses button
  7. Click the OK button when you have finished editing the song and then it will be available to select in the song list

Tagging Songs

Tagging songs is simple. You may need a new tag.

  1. From the the Edit menu at the top of the application, select "Manage Tags..."
  2. Add the tags you need in the Manage Tags screen
  3. Now from the the Edit menu at the top of the application, select "Manage Songs..."
  4. Select the song you want to tag in the song list
  5. Click the Membership button
  6. Select the tags you want to apply to the song

Exporting Songs

You can export any songs you have tagged. (Click on the Tagging songs tutorial to find out more)

  1. From the the Tools menu at the top of the application, select "Export Songs..."
  2. Select the tag you want to export, the songs that have this tag are displayed below the tag list
  3. Click the Export Songs button
  4. Enter a filename to export to, you can click the Browse... button to help with this

Controlling the show

Once you have entered the live fullscreen mode, you can control the action using just a few key strokes :

  • To exit live fullscreen mode :

    • Press the q key or
    • Press the <Esc> or <Escape> key
  • To move to a specific verse just press the number key that matches the verse you want to jump to. If the verse spills over to another page, then just pressing the spacebar will move to the next portion of the verse. Pressing the verse number again will move back to the first page of the verse you are on.

  • To move to the song chorus just press the c key. (Press the spacebar for any overspill.)

  • To move to the song bridge just press the b key. (Press the spacebar for any overspill.)

  • To move to the next verse or chorus:

    • Press the spacebar or
    • Press the n key or
    • Press the Page-Down key or
    • Press Down-Arrow key
  • To move to the previous verse or chorus:

    • Press the p key or
    • Press Page-Up or
    • Press Up-Arrow key or
  • To move to the next song or bible verse :

    • Press <Shift> + Right Arrow key
  • To move to the previous song or bible verse :

    • Press <Shift> + Left Arrow key
  • To show or hide the display of words :

    • Press the h key

Using the mouse

You can jump to bible verses or a song in the playlist, using the mouse.

When you start to move the mouse ChimePlay will display the current playlist, just click on the bible verses or song you want to view and the display will imediately switch to the new selection.

The playlist selection will be automatically hidden after 2 seconds of mouse inactivity. Or you can hide the playlist selection straight away by clicking the X.

Click the + to start adding new items to the current playlist while still in fullscreen mode.

Multiscreen support

Chimeplay Installation Follow these steps to change which screen the fullscreen mode window will appear on *:

  1. Click the Preferences button on the ChimePlay application toolbar.
  2. Select the Fullscreen number where the fullscreen mode window should be shown (0 - is the first screen, and 1, 2, 3 etc... are the extra displays)
  3. Click the OK button to save your settings

* Note - Modifying the Fullscreen number will require you to exit from ChimePlay and then re-start / re-open ChimePlay.

You can purchase a licence for ChimePlay Version 1.0 using the Buy Now button below.

The cost is 329.99 GBP for a permanent licence to use ChimePlay Version 1.0.

Before you purchase your licence, please ensure you have registered with ChimePlay and that we have a record of the email you will use to make your payment with, if you intend to pay from a PayPal account, then this needs to be the email address PayPal have on record for you. You can check and modify your payment email address in the Member's area

As soon as we have received your confirmed payment, you will be able to download your specific permanent licence file from the Member's area

Select Product :

N.B. If we cannot match the payment email to your ChimePlay payment email, then there will be a delay while we manually generate and email you your licence file. We can only send this to the email address that you used to buy your licence.